DATSUN ENGINE PARTS SOURCES
In 1996 I remember my local Nissan dealer had the original microfiche and was still able to get quite a few factory parts. I was able to order a set of original metal "240Z' B-pillar badges and quite a few other obscure parts. Then in 1997 Nissan began their restoration program of rebuilding 200 vintage 240Zs for sale on showroom floors to promote the release of the "350Z". The downside is that it stripped all the remaining original Z parts from Nissan parts bins. You may be able to find some generic bearings and pieces if you know the parts numbers. But stocks of parts that were made 30+ years ago have been depleted.
ROCKAUTO
Rather than scour parts bins the best source for Nissan mechanical parts is Rockauto.com. Sometimes you can find oddball parts like new flywheels, rebuilt distributors, and more.
BECK-ARNLEY
Beck Arnley has been a parts distributor since 1914. Due to their high quality and Nissan-like prices, I've always suspected they import and rename parts from the same sources as modern day Nissan. A timing chain set of theirs I purchased in 2006 was labeled "Made in Japan", a welcome surprise. A main bearing set I bought recently was labeled "ACL" of Australia which is highly respected. I've always trusted Beck parts for their high qualityeven if its hard to know exactly who made the part.
FEDERAL MOGUL
The American company Federal-Mogul of Michigan owns nearly every other aftermarket company: Sealed Power, Speed Pro, Fel-Pro, Champion, Carter, Ferodo, Wagner, Moog, Wagner, National, Precision, Abex, Anco, and supposedly Crane Marine. This gives Federal Mogul a huge inventory to draw from for Z parts. However, they declared Chapter 11 in 2003 due to asbestos claims. Since the 2009 meltdown of American car companies, you can bet that L-series parts have becom less of a priority for them.
BORG-WARNER (BWD)
Borg Warner is well-known for their T5 transmissions but sold the rights to Tremec in the 1990's. Their distributor caps and rotors used to have desireable brass contacts and a decade ago bought a 240Z mechanical voltage regulator which was very high quality.Today they are a niche company which concentrates on high-quality electrical items such as voltage regulators and ignition parts.
DANA and CLEVITE
Dana is the parent corporation of Clevite and in March 2006 declared Chapter 11 bankruptcy. Napa used to carry Dana parts which consisted mainly of bearings sets and pistons parts. Clevite made an OEM L-series camshaft I once bought from Black Dragon Auto.
L28 BLOCK CHOICE
According to Nissan there were 2 different L28 blocks: 1975-80 and 1981-83. The early L28 block is stamped N42 to the right of the driver side motor mount while the later block is a F54 with "siamesed" cylinder bores. Siamesed means that instead of each cylinder wall having collant passages betwwen them, additional webbing supports were cast between the cylinders 1-2, 3-4, 5-6 to increase rigidity.
 |
 |

BALANCING
A Nissan L28 is not same as a small block Chevy yet people insist on using the same rebuilding folklore that their grandfather used. There are 2 "types" of balanced car engines. "Internal" and "External". Datsun L-series "ZCAR" engines have been internally balanced since the car's inception.
- INTERNAL drills holes in the crank counterweights to balance it while the pistons and rods are prebalanced at the factory.The flywheel and front pulley are separately balanced and can be changed without affecting rod/piston/crank balance in the engine.
- EXTERNAL uses an unbalanced crankshaft with frequently unbalanced pistons and rods. A front "harmonic balancer" and counter-weighted flywheel are used to smooth things out and dampen vibrations. Change one and the whole rod/piston/crank assembly can go out of balance.
V8s can be Internally balanced to create good Primary balance, but the V design can produce Secondary balance problems because a piston and counterweight are always off axis. This is why a machine shop asks you to bring in "everything" (crank, pistons, rods, flywheel) when you want a V8 engine balanced: they use a complicated series of plumb-bob weights on the assembly while rotating it at typically 900rpm. An inline-6 has the rods moving in the same plane giving it excellent Secondary balance, all you need to do is make sure the crankshaft is balanced and the pistons/rods are identical in weight. At rebuild time you should still get both the crank and pistons checked by the machine shop. But on my last four L28 engines I have never had a factory part needing re-balancing. Go Nissan!
| A crankshaft with only two ounce-inches of imbalance at 2,000 rpm will be subjected to a force of 14.2 lbs. At 4,000 rpm, the force grows to 56.8 lbs. Double the speed again to 8,000 rpm and the force becomes 227.2 lbs. |
As you see in the V8 factoid above, engine balance is critical because even the slightest out-of-balance piston/rod throws off the balance on the whole assembly. Just picture an unbalanced gyroscope running at a high speed! Detroit didn't help matters by producing V8 engines that were externally balanced, sometimes even in the high-performance versions. Why? Likely because forging steel parts and balancing thousands of engines on an assembly line was expensive and time-consuming. As a result many V8 crankshafts and rods were made of weaker nodular or cast iron. Because of the quality metallurgy Nissan L-series Z motors easily turn over 200k miles while American ones of that era were lucky to see 100k.
CONNECTING RODS
Datsun connecting rods were matched as a set at the factory. Racers like to grind and polish them (Chevy folklore again) but checking the balance is all that's necessary for the street.The factory says to replace the rod-bolts on every rebuild, but if you're being cheap you can get by with re-using the stock bolts. I've built 3 motors reusing the stock bolts, which I have driven very hard with no problems. But for my newest rebuild I went to Summit Racing and got a set of ARP rod bolts, part# ARP-202-6003 which will last forever. Some people insist that you should get the big ends of your rods recut and resized at rebuild because they will be out-of-round from heavy use. This is another holdover from muscle-car days when cheap connecting rods always needed resizing when the big ends were oval from the pounding of an unbalanced engine. While I'm sure some Datsun rods have required resizing I wouldn't consider it a must. My machine shop laughed when I asked them to do mine. They said forged Datsun/Nissan rods are so stout it's not an issue but checked mine anyway. They were perfect. CLEANING
When cleaning off the hard carbon on the piston tops, don't use a wire brush on a drill or you'll grind into it. I let the tops soak in carb cleaner for a while and then use a real Scotchbrite pad. It takes a while to get it all off but be patient. Use a piece of broken ring to clean out each groove, and make sure the grooves are PERFECTLY clean with no burrs. Lightly polish the skirts till they gleam, make sure no sharp edges are present that could scratch the cylinder wall.
RING TYPES
There are three types of piston ring materials used on the face of top rings for automobiles: cast iron, moly, and chrome.
MOLY Molybdenum is very porous which results in more retention of oil in the face of the ring and also has the highest melting point of the three types. In continuous high speed or severe load conditions moly faced rings are considered the best choice because of high scuff and scoring resistance. I've read that stock Nissan top rings were moly and I think Arias currently makes moly rings for L-series motors.CAST IRON According the Nissan "Honsowetz" L-series rebuild book, cast iron rings are a good choice for the street in Nissan motors. For typical driving where the car is not subjected to long periods of high speed or on paved streets, plain cast iron is considered very durable. While there is nothing wrong with cast iron, it seems to be used more for stock replacement applications than high performance like chrome and moly. The Beck-Arnley rings I've used appeared to be cast iron.
CHROME These are recommended for a "dusty environments such as offroad racing". I'm not sure why dust is assumed to be in the cylinders, but chrome's smoothness and hardness keeps dirt from impacting into the face of the ring which can cause cylinder wear. Its resistance to scuffing and scoring is higher than cast iron but somewhat less than moly and it requires a special honing finish on the cylinder wall because chrome is so smooth. Sealed Power, Total Seal and AE Clevite makes chrome rings for the L-series. ITM replacement pistons are listed by ITM as having top chrome rings with cast iron 2nd rings.
Moly rings are considered the "best" for high performance as they seal well, resist scuffing and are used on nearly all modern performance motors. Cast iron is very durable and seals well, I've used them on the last three motors with no problems. Chrome is good for performance too but requires a special hone finish in the cylinder to break in properly. I wouldn't lose sleep over which is best, buy what makes you feel most comfortable.
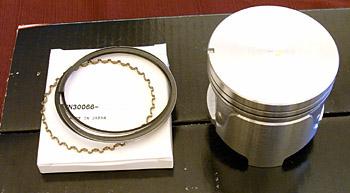
ITM .5mm versize flattopRING INSTALLATION
Don't try to install or remove piston rings with your fingers, spend $5 and buy a piston ring spreader. It makes installing them much easier, and reduces any scoring of the piston as well as the possibility of breaking one (as no-one sells single piston rings).Ring oiling: The 45 year old Haynes 240Z repair manual says to "liberally" oil the pistons before install which was changed to "lightly" in the later 280ZX version of the book. Confused, I called and spoke to a tech at Total Seal Piston Rings and asked his advice on installing rings. He was emphatic that rings should be broken in "dry"with only a light film of oil on the cylinder wall, no dipping the piston tops in oil like some old books show.
BOTTOM END
I agree. Except for what sits in the cylinder crosshatching, oil does not make it up past the oil control rings under normal conditions. So if you use the the old-timers practice of dipping the piston-top in a bucket of oil before install, it can clog the ring lands and glaze the rings during break-in. So I lightly pre-oil the edges of the rings and the cylinder wall but that's it. You should make sure the piston skirts are oiled to prevent scuffing however. But no need to be paranoid: as soon as you turn the engine over the skirts and cylinder walls get lubed automatically.
BORING
The max safe overbore on a L28 is said to be about .060" although the riskier people have gone out to .100" or higher. NOTE: scrimp on other things but get your block bored properly. Otherwise you will live with blowby and reduced horsepower until it's bored properly someday. A quality shop will try to leave about .004" of material unbored to be used up when they hone the cylinder. So if you decide to get your block bored ask them how much they leave on for honing. HONING
Nissan cylinder bores are very tough nickel-steel. While old American engines commonly require a rebore, it's very common to open up a 30 year old Nissan motor with 200,000+ miles to find the factory crosshatching intact in the cylinder walls. As a result it's not always necessary to rebore the cylinders unless you have the need for an oversize piston. If you decide to simply add new rings you can usually get away with honing the cylinders to roughen or "de-glaze" them. This is standard engine rebuilding practice that's been done for decades and when done properly produces good results. However, if you have a scratch running top to bottom that's deep enough to catch your fingernail you should get a rebore. If you use a honing tool long enough to take out a deep scratch it will take off too much metal and cause concentricity problems. FLEX-HONE If you want to hone it yourself try a "Flex-hone" made by the company Brush Research. It looks like a bottle brush with a stone on the end of each bristle. It fits into your power drill and lets you hone each cylinder yourself for 10-30 seconds. This de-glazes the wall and creates new crosshatching for rings to seat. The crosshatching should appear at a 45 degree angle to maintain oil.
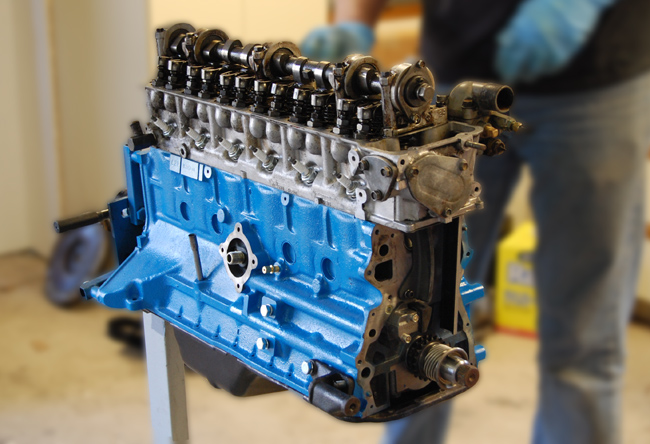
The model to buy for a L28 (86mm) cylinder is the GBD-3 1/2" (89mm) with a silicon carbide stone. I use a 240 grit which is their finest for honing. My machine shop used to recommend carb cleaner as a cutting oil, but but Flex-Hone says to only use a 10W-30 or their own brand cutting oil. I have used their special Flex-Hone oil for mine with great results.BELOW: F54 bored out .5mm with new pistons

GLYPTAL PAINTING
After cleaning off casting flash and grinding down any sharp edges in the crank area of the block, you might consider painting the interior with Glyptal. Glyptal has been made by GE since 1924, and is mainly used as a heavy enamel for armature windings on generators. For years racers and vintage engine rebuilders have been using it to coat the interior of blocks at rebuild time. Oddly, web opinions are few and everyone quotes exactly the same benefits: "...to seal the metal pores, and aid in oil runoff".
To be honest I've never thought of those as problems needing solutions in a car engine, so here are my own reasons to paint the block interior: "...to prevent sludge from adhering to the metal surfaces, the added peace of mind that you've prepped the interior of block and sealed any grit, and that it looks great".
I've seen photos of people lining cylinder head valleys, timing covers, etc with the stuff. Personally I feel that the block interior is the only area that should be painted and that the bearing caps should remain uncoated. I leave the bearing caps uncoated as it worries me that oil might get under the sharp edges and bolt contact surfaces and lift the enamel. However, an engineer friend of mine says his company paints the insides of the magnesium transmission housings of their helicopters with Glyptal. If it ruined the engines of high dollar auto-restorations I think we would have heard horror stories by now. Of course you should grind and prep the metal to make it adhere well and use brake cleaner to clean all the grease off before painting. IMPORTANT NOTE: as durable as Glyptal is when dry, spraying brake cleaner on it makes it bubble and dissolve into shreds very quickly which is disconcerting. Motor oil doesn't have the same solvent properties, but l'm surprised that this has never come up before that it's so sensitive to solvents. Something to keep in mind.
CLEANING BORES When cleaning out honed bores use a shop towel which is typically made of lint-free cotton, don't use paper towels which are really just sheets of compressed wood fibers that can remain in the metal grain. And instead of using WD40 or brake cleaner an old trick is to use ATF (auto transmission fluid). ATF is a 10 weight oil with high-detergent properties with an unusual feature: When used to clean metal parts it seems to pull up residue that nothing else will. On my last rebuild I thought the honed bores were clean, but after running a shop towel with ATF through it came out with gray residue. Mysterious and very cool. CRANKSHAFT
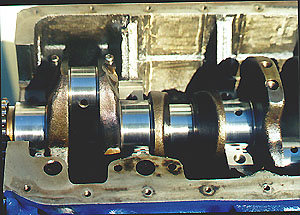
Precision forged steel, this is the very heart of a Z motor. With the stout 7 bearings it's mainly responsible for the longevity and durability of these engines. Japanese crankshafts are generally perfectly balanced, and these are no exception. But if you're doing a rebuild, it's worth getting it checked and journals polished by the machine shop. The last one I had checked had 140k miles on it...the shop said it needed NO balancing at all. The rod/pistons from it's motor were all within 1/2 a gram as well. Let's see an American car company from 1983 manage that one! All the shop needed to do was polish the bearing journals on the crank.
As tough as crankshafts are you should be careful if standing it on end while storing. The reason is that if it falls over and whacks the floor it can bend the crank enough to throw it out of balance. This is especially true on long, in-line 6 crankshafts.CAM CHAIN TENSIONER
FRONT COVER
As you probably know, there's a chain-tensioner deep down inside the front cover. This little item presses tightly against the cam chain and is a real problem if you take the cam sprocket off without wedging the chain in place, you'll find that suddenly the timing chain is too short. This is because the slack is taken up as this tensioner pushes against the chain. I've heard of some people levering it back with a long screwdriver but I don't trust that. If you messed up the chain timing, you should remove the front cover and reposition everything to be sure its correct. A few hours work unfortunately.
Since the oil and water pump are here the mating surfaces on the cover must be spotless upon installation, otherwise you will have an oil or water leak. It's very hard to get the old gaskets off so spend extra attention here. The best method is to use gasket removal spray and then a sharp razor blade to slice off the old gaskets, be careful not to gouge the aluminum. Then follow it up with fine emory paper on both the cover and engine block surfaces. Use a brush-on gasket sealer like Permatex 300 to seal it tight as a drum.Before install you should tap out the threads on the front of the block. The original bolts get pretty cruddy, so I would use new ones. As recommended by the factory, put an extra spot of sealer in each corner of the cover to seal against pan oil leaks. NOTE: be very careful when removing the distributor and/or water outlet base bolts. After 35+ years they get frozen in and will break off in the aluminum easily. The distributor base is usually removable, but be wary of the water outlet bolts because it will ruin the cover if you break one off.
FRONT BALANCER
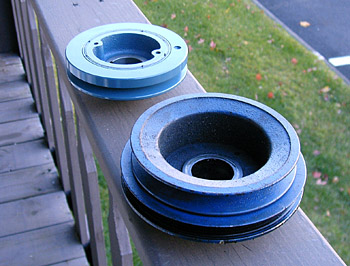
Unless you have a need for AC and power steering and have no choice get rid of your 3-row pulley and replace it with a 2 or 1-row. I've weighed all three and here are the weights.
- 3-row: 8 pounds
- 2-row: 6 pounds
- 1-row: 3.5 pounds

You should always replace the woodruff key in the snout of the crankshaft when you replace the balancer. If you're one of those unlucky people with a damaged woodruff slot in the nose of the crank you can use epoxy to hold the key in. Don't epoxy the balancer on, just use it beforehand to cement the key.
I find the easiest method to reinstall the balancer is to find a large thin metal washer that overlaps the balancer's inner hole, but allows the bolt to fit though. You can then slowly tighten the bolt and the washer will evenly push the balancer on while not jamming up the woodruff key. Don't resort to hammering or tapping it back on or you will screw everything up. You should use antiseize on the balancer bore before installation and yu may need some emory paper to smoothen things out beforehand.
CYLINDER HEAD
VALVE SEALS
Valve seals tend to shrink as they age and let oil drip past them into the cylinder, creating smoking on startup. They are inexpensive and not as tough to replace as you think. One method is to stuff a thin rope through the spark plug hole to hold up the valves. Another method is to get a foot of clear vinyl hose from the hardware store. Bring the piston to the top of its stroke and push the hose as far as you can through the spark plug hole. It compresses against both valves and holds them fully up. You can them take off each rocker-arm/spring to replace the seal. When finnished simply pull the hose back out. Beforehand search the internet and buy a KD 3087 spring compressor which is made for OHC engines and fits a Z head perfectly. Using this tool with the hose trick lets you whiz down the head and replace each seal in under 5 minutes.BEARING PRE-LUBE
You should always use a good startup lube to keep the bearings slick on startup to prevent scuffing or seizing. Permatex makes an excellent red, gooey pre-lube in a small bottle. Mixing it 50/50 with new motor oil makes a great pre-lube. Use it liberally on all new bearings, piston skirts and rotating surfaces. GM makes an engine lube called "EOS" sold at Chevy dealers which is also an excellent pre-lube. It used to be high in ZDDP additive but I believe the newest EOS version may not be.HEAD GASKET
According to Nissan, L-series head-gaskets should be installed dry (no sealer). I really like the Fel-Pro brand. It seals well and as a bonus at rebuild it simply pops off the block, little scraping is necessary. I've seen comments that it's thinner than a stock gasket, and may increase compression slightly. I've also heard it may not seal well for turbo motors but on regular motors I think it's ideal. I very lightly spread Permatex 300 around the water jacket holes on the gasket and on the front edge around the chain hole. This keeps it from weeping coolant or oil from the edges which sometimes occurs on older motors.FRONT COVER
Fel-Pro makes a great little kit that includes gaskets, distributor base gasket, balancer seal, water pump gasket. Use brush on sealer (Permatex 300 again) and it should seal tight as a drum. Make sure you triple-check cleanliness to make sure there are no gaskets bits left on the contact surface, a razor-blade lightly slid down the surface can find them.
NOTE: As I said above, be careful trying to unbolt the radiator hose neck on the passenger side of the cover. On e last three covers I've cleaned, the steel bolts were frozen solid into the aluminum.
INTAKE/EXHAUST GASKET
I have never understood the tale that a stock exhaust gasket is supposed to "leak" when used with a header. It's torqued to the same ft/lb as a stock one, so there's no reason why it shouldn't seal identically. MSA sells a quality gasket with their headers which has a metallic core and is very similar to the Fel-Pro. I have it on my Z right now with great results. I have also used a Fel-Pro intake/exhaust gasket ($20) with a metallic core. Well they all seal perfectly with no black soot around the exhaust ports. Maybe I got lucky, but I consider the warnings of using a stock gasket with a header to be an Chevy old wives' tale.
TIP ONE: before header installation, use a flat file across the ports on the flange sealing. Headers can have unseen high spots on the flanges which can cause leaks.
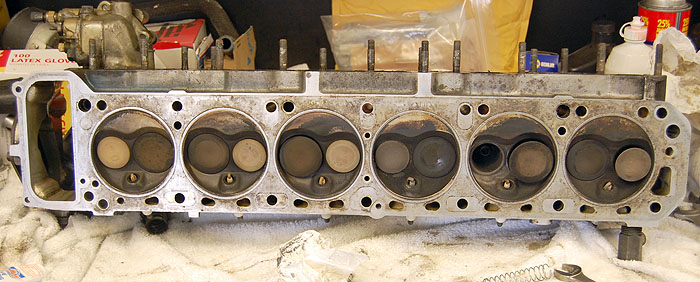
TIP TWO: as seen in the cylinder head photo above, use 8mmx1.25x45mm studs in all head bolt holes. This lets you really crank down the nuts to tighten the manifolds.OIL PAN GASKET
FASTENER CHOICES
Spend some time using a straight edge across the pan to see high spots and problem areas. Place it on a concrete floor to see any bent edges and tap down any bolt holes that are dimpled. I use a foot long piece of 1"x2" wood trim and a mallet to tap around the edge of the pan and flatten it down. Then use black RTV sealer on both sides of the gasket and finger tighten the bolts. Then tighten them a couple of times over the next hour or so.
BOLTS
Don't use black oxide (carbon steel) bolts for locations exposed to the elements. They are high strength and look great when new, but the black oxide they are covered with is thin and the ones I've used rust heavily within a few days exposure to the elements. These work well as head and rod bolts because they remain covered in oil. The rod and main bearing bolts can be upgraded to ARP brand bolts which are ultra-high quality.
Stainless steel isn't as strong as alloy steel, but works fine in the front cover and other engine locations where specialized bolts aren't needed. They might be a bit more expensive, but using stainless steel bolts will provide long-lasting good looks and retain a nice patina when aged. Cadmium plated steel bolts are the greenish-gold colored versions the factory used. The plating is excellent for automotive applications because it resists corrosion and binding but have been phased out due to environmental concerns. While SAE cadmium fasteners are still available online, I have yet to find a place that sells retail cadmium-plated metric nuts and machine bolts other than the dealer.
Yellow Zinc is a modern cadmium replacement with as similar finish.Zinc (silver) zinc plated steel is a good choice with high strength. These are the bolts sold at most hardware stores. They initially look shiny and weather well, ut the zinc finish tends to lose luster and turn a dull grayish color.
Aluminum is soft and tends to oxidize with a whitish residue and corrodes in the elements. I don't consider these a good choice even in tiny sizes as the threads strip easily and they are prone to breakage. METRIC OR STANDARD
Don't insult this car by tapping out a bolt hole and installing a SAE bolt, it has enough trouble staying Japanese without all it's metric "bones" being replaced. TIP: While SAE bolts come in a simple "fine" and coarse", metric 8mm bolts come in 1.00 and 1.25 thread pitches and 10mm in 1.00, 1.25, 1.50, and 1.75. In 25 years I've never found a hardware store that carries all the pitches.TAPS
Do yourself a huge favor, and spend a few bucks on a metric tap and die set. These tools are used to recarve threads in rusted/stripped bolt holes, and will save your sanity several times over. Try to tap out every hole you remove a bolt from (same size of course) to ensure accurate and trouble free torquing. This especially true on the head, where sticky manifold threads can cause you to overtighten, resulting in stripped threads. Also when the head is off, tap out the all bolt threads in the block. This gives much more accurate torque readings when installing the head.ANTI-SEIZE
COOLING
Anti-seize is a brush-on silvery paste made out of molybdenum disulfide. When used on threads, it keeps bolts from seizing for literally forever, even in wet or high temperatures. Done in conjunction with tapping the holes ensures yourself, and any future owner, a car with easily loosened, but properly tightened bolts. Get it at better parts stores, very recommended. When possible use anti-seize on EVERY bolt on the car before replacing them.
RADIATOR
I bought a new 3-row 240Z Datsun radiator off the internet for $120 a while back, excellent quality. Mine was worth every penny: it dropped my temperature about 10 degrees and my needle barely goes over 160 now. If yours is 30 years old it might be time to let it go.
3-rows are said to be the largest width for use on the street as a 4-row can have less airflow due to the extra thickness.Unless you have a some serious needs a new 3-core radiator with a pair of 12" cooling fans is going to do just fine.
MOTOR OIL
The quality of the oils used today versus what was available in the 1970s is night-and-day. Back then they sludged up motors and filled oil pans with glop, it's amazing so many Z engines made it to 200,000 miles using that oil. It really says something about the quality of Datsun engines as a whole. Today's SQ API rated oils have much more detergent and anti varnishing abilities and are said to be stable out to 10,000 miles.
HOWEVER: older engines with mechanical valve tappets like the ZCar L-series engines and V8s with flat tappets (not roller cams) were designed for motor oil which contains a moderate amount of zinc and phosphorus known as ZDDP (zinc diaklydithiophosphate). ZDDP is considered a miracle lubricant for engines and has been used for about 80 years in motor oil and greases worldwide. Modern car engines weren't designed to need ZDDP so the modern-day automotive world doesn't even mention it. But for vintage car and hot-rod owners the diminishing levels ZDDP in oil is a real issue because it's required to lubricate the cam lobes and prevent wear across the rocker-arm surfaces.
While zinc is not directly harmful to the environment, if its burned due to ring blowby it ruins your catalytic converter. So the EPA has quietly pressured the oil companies to reduce the percentage of ZDDP in their passenger car oils. This extends the life of converters, which in turn reduces total car emissions in the environment. In the early 2000s complaints from the construction industry allowed some diesel oils like Rotella T made by Shell to use higher levels of ZDDP which they claimed was needed on heavy equipment. Starting in 2007 construction equipment had tighter emissions standards, and in 2016 a new standard called PC-11 was implemented by the EPA/NHSTA/engine companies to increase emissions standards. I can find no mention of zinc or ZDDP in the PC-11 oils.
Luckily there is still one company market a higher ZDDP oil for passenger cars in a viscosity that doesn't reduce horsepower: Valvoline Their VR1 10W-30 racing oil used to be a SH grade which means the ZDDP wasn't low enough to qualify it as a SL or SM grade. In 2026 it's listed as a SL. Valvoline's MSDS sheet lists it at 1.3% phosphorus/zinc, 1% sulfated ash and 2.5% calcium which makes for a nice lube cocktail. The new SM grade oils all have about .08% ZDDP to conform to EPA standards. Valvoline states it exceeds SM levels of protection.
OIL FILTERS
Oil filters don't increase horsepower or make the engine breathe better...they filter the oil. The particle size considered to cause the most wear is said to be around 15-30 microns in diameter. What you need is a filter which can reliably filter the smallest particle size from your oil supply. But be careful using racing oil filters as many are designed for maximum flow by allowing everything up to 50 microns or so to pass into the engine...which I guess is fine if you tend to rebuild your motor every season. WIX filters appear to be of high quality and filter down to 19 microns. Their advertising is aimed at people who understand engines. The filter they list for 1970-83 Z car engines is #51521.
NAPA makes a high-quality filter with part #1521 which filters down to 19 microns and is easy to find. Interestingly, the specs between WIX and NAPA are identical and it appears they may be the same filter. Between the identically spec'd pair I use the NAPA because it's easy to find and the black case looks great against a blue block (WIX is plain white). The NAPA name may conjure up thoughts of truck parts, but isn't that what you want... a quality filter designed for long service duty?
There have been some puzzling ani-Fram comments on the internet at times. But I remember in the 2000s Consumer Reports magazine named FRAM the best on the market and I have used them since 1980 with no problems including on my current engine. They are rated at a filtration level of >20 microns.BREAK-IN TIPS
There are a lots of methods to breaking in motors, from running full throttle immediately to babying it for 1,000 miles. Keep in mind that bearings generally don't need break-in, what we want to concentrate on is seating the rings against the cylinder walls to ensure high compression for the engine's life. This needs to be done properly early on.
- Immediately on first startup, check the oil pressure and bring the engine up to 2,000, listening for noises, looking for leaks, adding water, etc.
- Try to use as little choke as possible as the extra gas can wash the oil from the cylinder walls and affect ring seating. Don't race the engine but blipping the throttle is fine. Let the motor idle at 2,000 until it reaches full operating temperature. Once at full temperature bring it down to idle, re-check the timing, synch the carbs.
- If all seems solid I go for a test-drive as soon as possible. You need a nearby road with no traffic or a parking lot for this next step: Once on the road accelerate moderately up to 3,500 or so in a lower gear, let off the gas abruptly. Let the engine braking pull the motor down to 1,500 or so. Do this 10 or more times in the lower gears, in different rev ranges. This is a well known method which uses the engine vacuum pull the rings against the cylinder walls to ensure proper seating.
After these initial "throttle dumps" do some moderate driving at different speeds around the area. Continue to do moderate acceleration, occasionally backing off the throttle as before using the engine vacuum to brake the motor. Some people say the rings seat immediately, but I like to take my time over the first couple of hundred miles to let the rings seat smoothly.
Try to do as much driving in this first phase as possible (first startup should be a weekend). Change the oil at 100 miles. By the time you get a couple of hundred miles on the motor you will notice the idle is smoother and more stable, with smoother revving and all around "better" feel. If your cylinders have been bored properly ring seating is generally quick at a couple of hundred miles. Doing a compression check will tell you for sure.
Don't start doing 0-60 runs with the startup oil in the crankcase as it has pre-lube remnants and other contaminants in it. At 500 miles if everything seems stable and tight, start taking the engine closer to redline occasionally. By the time you get to 750 miles you should be revving the engine to redline with no guilt.